

- Stock: In Stock
- Model: RDDLZ-UM-2
- Weight: 1.00
- SKU: RDDLZ-UM-2
Available Options
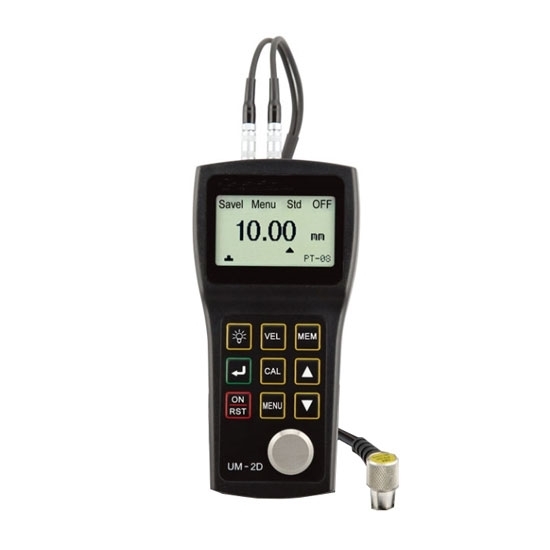
The ultrasonic thickness gauge is portable, durable and high-accuracy ultrasonic thickness measurement device based on pulse-echo or echo-echo principle. This series of ultrasonic thickness gauge can be widely used in the fields such as manufacturing, metal processing, chemistry and business inspecting for measuring the thickness of all sorts of materials where the ultrasonic wave can spread through with a constant speed and get the reflection from the back side.
The ultrasonic thickness gauge not only can make accurate measurement on various kinds of plates and processing components like metal materials, high temperature pipes, pipes, steel plates, aluminum plates, plastics, iron pipes, PVC pipes, glass, etc., but also test the thickness loss of pipes and pressure containers after corrosion.
Features
- 0.01mm or 0.001 inches resolution
- 128*64 pixels display with backlight
- 500 thickness readings can be stored
- Hi-Low alarm setting
- Minimum thickness capture
- V-sound path correction
- Bult-in 7 types of transducer compensation line
- Through paint/coating function (RDDLZ-UM-2D only)
Details
Specification
| Model | RDDLZ-UM-2 | RDDLZ-UM-2D |
| Display Type | 128 ×64 dot-matrix LCD screen with EL backlight | |
| Operating Principle | P-E (pulse-echo) with dual-crystal probe | P-E (pulse-echo), E-E (Echo-Echo) with dual-crystal probe |
| Total Measuring Range | 0.8mm-300mm, depending on material and probe | |
| Measuring Range in Standard Mode | Standard probe PT-08: 0.8mm-100mm | |
| Measuring Range in Thru Coating Mode | N/A | 3-20mm with PT-08 probe |
| Measuring Limits of Tube (Steel) | Φ20mm×3.0mm (PT-08 probe) The measuring error is up to ± 0.1mm. | |
| Measuring Error | Lower limit to 10mm: ±0.05mm 10mm to upper limit: ±(0.5%H+0.01)mm Note: H is the actual thickness of the tested material | |
| Repeatability | 0.05mm | |
| Display Resolution | 0.01mm or 0.001 inch | |
| Units | Inch or Millimeter | |
| Calibration Method | Zero calibration, Two-point calibration | |
| V-Path Correction | Automatic | |
| Update Rate | 4Hz | |
| Material Velocity Range | 1000~9999m/s (0.0394 to 0.3937in/μs) | |
| Memory Function | 5 arrays are divided to store 500 thickness values | |
| Minimum Value Checking | Taking the probe to move along the surface of the tested material, the gauge is able to find the thinnest point automatically. | |
| Warning Function | If the measured value exceeds the pre-set thickness limit, the guage will sound an alarm. | |
| Velocity Storage | Can store the velocities of 5 different materials in total | |
| Languages | English and Chinese | |
| Communication Port (Optional) | USB port or Serial RS 232 port | |
| Application Software (Optional) | UmView Software for data transmission, storage, analysis and document editing | |
| Power Supply | Two 1.5V AA alkaline batteries (Alarm for low battery voltage) | |
| Operating Time | Up to 200 hours with alkaline batteries (without backlight) | |
| Instrument Shut-off | AUTO OFF after 5 minutes of no operation | |
| Operating Temperature | -10℃ ~ +50℃ | |
| Size | 149mm×73mm×32mm (H×W×D) | |
| Weight | 210g including batteries | |
Note:
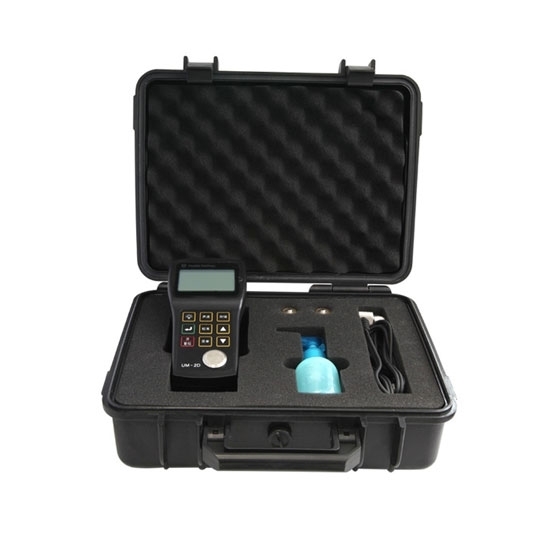
* Standard Packing List
Ultrasonic Thickness Gauge × 1, Standard Probe × 1, Battery × 2, Couplant × 1, Carrying Case × 1, Operating Manual × 1
(Kindly Reminder: Battery and Couplant is Not Included if Shipped By Air.)
** Optional Probes
| Model | PT08 | PT06 | PT04 | ZT12 | GT12 |
| Type | Standard | Small Tube | Fingertipe | Cast iron | High-Temperature |
| Frequency | 5MHz | 7.5MHz | 10MHz | 2MHz | 5MHz |
| Diameter | 11mm | 8mm | 6mm | 17mm | 15mm |
| Measuring Range | 0.8~100mm | 0.8~30mm | 0.7~12mm | 4.0~508mm | 4.0~80mm |
| Allowable Temperature | -10℃ ~ 70℃ | -10℃ ~ 70℃ | -10℃ ~ 70℃ | -10℃ ~ 70℃ | -20℃ ~ 450℃ |
| Picture |
Function Comparison
| Model | RDDLZ-UM-1 | RDDLZ-UM-1D | RDDLZ-UM-2 | RDDLZ-UM-2D |
| Operating Principle | P-E (pulse-echo) | P-E (pulse-echo), E-E (Echo-Echo) | P-E (pulse-echo) | P-E (pulse-echo), E-E (Echo-Echo) |
| Measuring Range in Standard Mode | 0.8mm-300mm, depending on material and probe | |||
| Measuring Range in Thru Coating Mode | N/A | 3-20mm | N/A | 3-20mm |
| Measuring Resolution | 0.1mm, 0.001 inch | 0.1mm, 0.001 inch | 0.01mm, 0.0001 inch | 0.01mm, 0.0001 inch |
| Probe Compensation Line | 1 built-in probe compensation line | 1 built-in probe compensation line | 7 built-in probe compensation line | 7 built-in probe compensation line |
| Data Logger | Y | Y | Y | Y |
Tips: Calibration of ultrasonic thickness gauge
Before measuring thickness with ultrasonic thickness gauge, the lower limit and linearity of the instrument should be calibrated. The lower limit of the instrument should be calibrated by a test block whose thickness is the lower limit. If the sound velocity of the material is known, the velocity value of ultrasonic thickness gauge can be adjusted in advance, and then the test block attached to the instrument can be used for the calibration with the "calibration key" button of the gauge. In fact, it is found that the thickness of the calibration block of different brands of UT thickness gauges are different, so we should pay attention to the thickness of the standard calibration block in the field inspection, so as not to adjust the wrong reference values.
Generally, the calibration test block attached to ultrasound thickness gauge is small. When the required thickness deviates from the attached one larger, the step calibration blocks is needed. The ultrasound thickness gauge shall be calibrated with the thickness close to the maximum thickness to be measured and the minimum thickness to be measured respectively (or half of the maximum thickness to be measured).
