
- Stock: In Stock
- Model: RDDLZ-UM-5
- Weight: 1.00
- SKU: RDDLZ-UM-5
Available Options
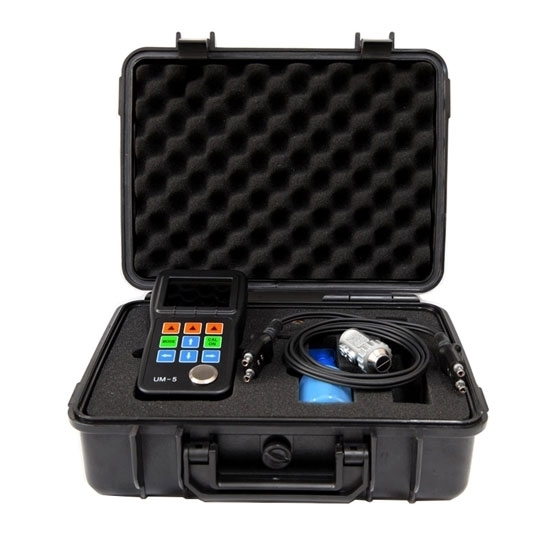
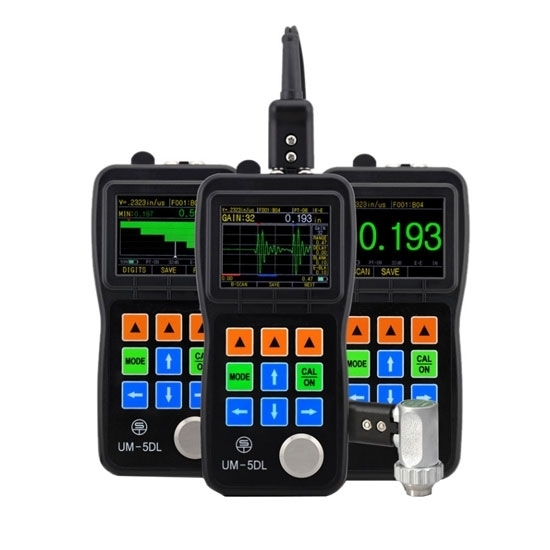
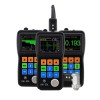
This series of digital ultrasonic thickness gauges with A-scan and B-scan function helps the user make more accurate thickness measurement. The thru-coating function available is designed for thickness testing without removing the paint. This instrument is widely applies for measuring the thickness of metal materials, pipes, pressure vessels, sheet metals (steel, aluminum), plastic, steel pipes, PVC pipes, glass and other materials.
Features
- High resolution 0.01mm or 0.001 inches
- Measuring range: 0.6-508mm
- Live A-Scan & Time-based B-Scan
- Adjustable GAIN, BLANKING, GATE, etc.
- 2.4"QVGA (320×240 pixels) OLED color display
- 5 rectify modes of RF+, RF-, Half+, Half-, and FULL for waveform display
- With thru-coating function, no need to remove the paintings (UM-5D, UM-5DL Only)
- Large data logger, can store 100,000 thickness values and 1000 waveforms (UM-5DL Only)
Specification
| Model | RDDLZ-UM-5 | RDDLZ-UM-5D | RDDLZ-UM-5DL |
| Display Type | 2.4" color OLED, 320×240 pixels, contrast 10,000:1 | ||
| Operating Principle | P-E (pulse-echo) with dual element transducers | P-E (pulse-echo), E-E (echo-echo) with dual element transducers | P-E (pulse-echo), E-E (echo-echo) with dual element transducers |
| Total Measuring Range | 0.6mm-508mm (0.025"-20.00"), depending on material, probe and surface condition | ||
| Measuring Range (Standard Probe) | TC510: 1.2-200mm | ||
| Measuring Resolution | Selectable 0.01mm or 0.1mm (selectable 0.001 inch, 0.01 inch) | ||
| Units | Inch or Millimeter | ||
| Gain | Adjustable at real time | ||
| Rectify Mode | RF+, RF-, HALF+, HALF-, FULL | ||
| Display Mode | Normal, Min/Max capture, DIFF/RR%, A-Scan, B-San | ||
| V-Path Correction | Automatic | ||
| Update Rate | Selectable 4Hz, 8Hz, 16Hz | ||
| Material Velocity Range | 500 to 9999 m/s (0.0197 to 0.3939 in/μs) | ||
| Languages | English, French, German | ||
| Alarm Settings | Minimum and Maximum alarm. Thickness readings color changes dynamically when alarming. | ||
| Power Supply | Two AA size batteries | ||
| Operating Time | Approximately 40 hours | ||
| Instrument Shut-off | Selectable ALWAYS ON or AUTO OFF after 5, 10, 20 minutes of no operation | ||
| Operating Temperature | -10℃ to +50℃ | ||
| Size | 153mm×76mm×37mm (H×W×D) | ||
| Weight | 280g including batteries | ||
Function Comparison
| Features | RDDLZ-UM-5 | RDDLZ-UM-5D | RDDLZ-UM-5DL |
| OLED Color Screen | Y | Y | Y |
| Live A-Scan | Y | Y | Y |
| Time-based B-Scan | Y | Y | Y |
| Control of Gain, Blanking, Gate, Range, Delay, RF & Rectify Mode | Y | Y | Y |
| Thru-coating/paint | N/A | Y | Y |
| Data Logger | N/A | N/A | Y |
| DataView Software | N/A | N/A | Y |
Data Logger of RDDLZ-UM-5DL Ultrasonic Thickness Gauge
| Capacity | 100,000 thickness readings, 1000 waveforms, 400 files |
| File Structure | Grid file |
| Rows × Columns | 21×12 |
| Communication Port | USB 2.0 port |
| Software | DataView PC Software |
Note:
* Standard Packing List
Ultrasonic Thickness Gauge × 1, Standard Probe × 1, Battery × 2, Couplant × 1, Carrying Case × 1, Operating Manual × 1
USB Cable × 1 (UM-5DL Only), Software × 1 (UM-5DL Only)
(Kindly Reminder: Battery and Couplant is Not Included if Shipped By Air.)
** Optional Probes
| Model | PT08 | TC510 | PT06 | PT04 | ZT12 | GT12 |
| Type | Dual Crystal Probes | UM-5/UM-5D/UM-5DL Standard | Small Tube | Fingertipe | Cast iron | High-Temperature |
| Frequency | 5MHz | 5MHz | 7.5MHz | 10MHz | 2MHz | 5MHz |
| Diameter | 11mm | 13.5mm | 8mm | 6mm | 17mm | 15mm |
| Measuring Range | 0.8~100mm | 1.2~200mm | 0.8~30mm | 0.7~12mm | 4.0~508mm | 4.0~80mm |
| Allowable Temperature | -10℃ ~ 70℃ | -10℃ ~ 70℃ | -10℃ ~ 70℃ | -10℃ ~ 70℃ | -10℃ ~ 70℃ | -20℃ ~ 450℃ |
| Picture |
Tips: Couplant of ultrasonic thickness gauge
In order to improve the sound energy transmission between the probe of ultrasonic thickness gauge and the workpiece, a thin layer of liquid applied between the probe and the detection surface is called a couplant.
When there is a layer of air between the probe of ultrasonic thickness gauge and the workpiece, the reflectivity of the ultrasonic wave is almost 100%. Even a thin layer of air can prevent the ultrasonic wave from entering the workpiece. Therefore, it is very important to remove the air between the probe and the workpiece. Coupling agent can fill the air gap between the probe and the workpiece, so that ultrasound can be transmitted to the workpiece, which is the main purpose of using the couplant. In addition, the couplant also has lubrication effect, which can reduce the friction between the probe of ultrasonic thickness gauge and the workpiece, prevent the workpiece surface from wearing the probe, and make the probe easy to move.
According to the surface condition and acoustic impedance of the workpiece to be tested, the coupling agents without bubbles and suitable viscosity should be selected, such as glycerin, oil, silica gel, water glass and paste, high temperature coupling agent, etc. If the surface of the workpiece is rough, the thicker coupling agent should be chosen. The coupling agents specially used for thickness measurement can also be used. In practical use, it is necessary to keep the coupling agent clean, not to make it stained, or it will affect the accuracy of measurement of ultrasonic thickness gauge.
