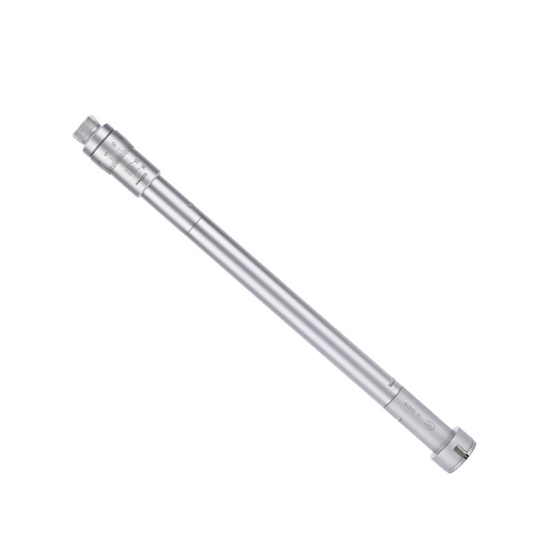
6-8 Mm (0.23" - 0.31") 3 Point Inside Micrometer
from
$317.06
Ex Tax: $317.06
- Stock: In Stock
- Model: RDDLZ-IM-68
- Weight: 1.00
- SKU: RDDLZ-IM-68
Available Options
Create unlimited custom product blocks and display them in accordions or tabs or open blocks. Each block can be assigned to all products at once or specific products according to advanced criteria.
Create unlimited custom product blocks and display them in accordions or tabs or open blocks. Each block can be assigned to all products at once or specific products according to advanced criteria.
Buy a 3 point inside micrometer online. The provided internal micrometer with equipped with a 150 mm extension rod, 6~8 mm (0.23 to 0.31 inch) measuring range and 0.005 mm resolution, ideal for the precision measurement of blind holes and through holes.
Features
- Inside micrometer is suitable for the precision measurement of blind holes and through holes.
- 3 point inside micrometer is equipped with a 150 mm extension rod, which can measure the size of deep holes easily and conveniently.
- Clear graduations laser-etched on a satin chrome finish for easy reading. Highly durable because of carbide-tipped measuring surfaces. Spindle hardened ground and lapped for ultimate accuracy.
- 6~8 mm internal micrometer built-in force limiter ensures accurate and repeatable readings.
Specifications
- Model: RDDLZ-SHAN-68
- Range: 6~8 mm
- Types: 3 Point Inside Micrometer
- Material: Bearing Steel
- Measurement Type: Internal Diameter Measurement
- Resolution: 0.005 mm
- Extension Rod Length: 150 mm
- Scale Process: Laser Scale
- Accuracy: 0.004/0.005 mm
- Package: Plastic Box
Details
Applications
The inside micrometer is an instrument for the accurate linear measurement of the diameter, thickness, length and other dimensions of solids. 3 point internal micrometer is mainly used to measure internal dimensions such as the internal diameter of a hole or a tube and is widely used in mechanical engineering, machining and most mechanical industries.
Tips: Maintainance of the Inside Micrometer
- Please check whether the zero line of the inside micrometer is accurate.
- When measuring, the measured surface of the workpiece should be wiped clean.
- When the workpiece is large, it should be measured on a V-shaped iron or a flat plate.
- Before using an internal micrometer to measure, the measuring rod and anvil need to be wiped clean.
- Do not loosen the back cover to avoid changing the zero line.
- Do not add ordinary engine oil between the fixed sleeve and the movable sleeve.
- After using the 3-point inside micrometer, wipe it clean and oil it, put it in a special box and put it in a dry place.
Builder in Product TAB
NEW! Since Journal 3.2, the much improved T.A.B (Tabs Accordion Blocks) system supports the page builder inside the tab content. Unlimited Blocks, Tabs or Accordions with any HTML content or the builder interface (supporting custom rows/columns/modules) can be assigned to any individual product or to certain groups of products, like entire categories, brands, products with specific options, attributes, price range, etc.
You can indicate any criteria via the advanced product assignment mechanism and only those products matching your criteria will display the modules.
Also, any module can be selectively activated per device (desktop/tablet/phone), customer login status and other criteria. Imagine the possibilities.
