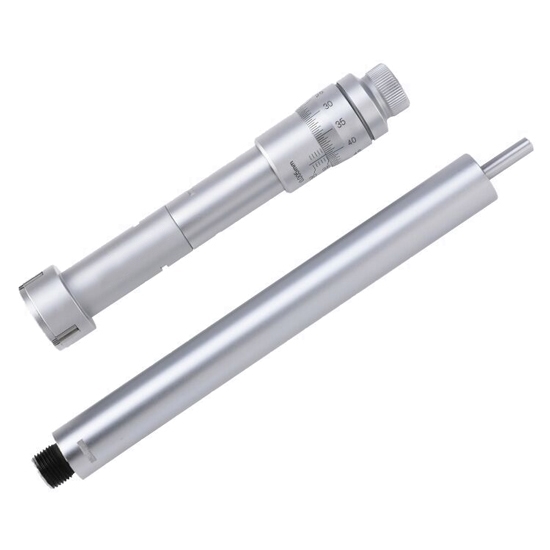
25-30 Mm (0.98" - 1.18") 3 Point Inside Micrometer
from
$291.41
Ex Tax: $291.41
- Stock: In Stock
- Model: RDDLZ-IM-2530
- Weight: 1.00
- SKU: RDDLZ-IM-2530
Available Options
Create unlimited custom product blocks and display them in accordions or tabs or open blocks. Each block can be assigned to all products at once or specific products according to advanced criteria.
Create unlimited custom product blocks and display them in accordions or tabs or open blocks. Each block can be assigned to all products at once or specific products according to advanced criteria.
Factory price inside micrometer for sale online. Buy it with a 25~30 mm (0.98" to 1.18") range, resolution 0.005 mm, 150 mm extension rod, clear scale, and durable bearing steel materials. 3 point internal micrometer is mainly used to measure inside dimensions like the inside diameter of a hole or tube.
Features
- Inside micrometer is suitable for the precision measurement of blind holes and through holes.
- 3 point inside micrometer is equipped with a 150 mm extension rod, which can measure the size of deep holes easily and conveniently.
- Clear graduations laser-etched on a satin chrome finish for easy reading. Highly durable because of carbide-tipped measuring surfaces. Spindle hardened ground and lapped for ultimate accuracy.
- 25~30 mm internal micrometer built-in force limiter ensures accurate and repeatable readings.
Specifications
- Model: RDDLZ-SHAN-2530
- Range: 25~30 mm
- Types: 3 Point Inside Micrometer
- Material: Bearing Steel
- Measurement Type: Internal Diameter Measurement
- Resolution: 0.005 mm
- Extension Rod Length: 150 mm
- Scale Process: Laser Scale
- Accuracy: 0.004/0.005 mm
- Package: Plastic Box
Details
Applications
The inside micrometer is an instrument for the accurate linear measurement of the diameter, thickness, length and other dimensions of solids. 3 point internal micrometer is mainly used to measure internal dimensions such as the internal diameter of a hole or a tube and is widely used in mechanical engineering, machining and most mechanical industries.
Tips for Using an Inside Micrometer
- Attention must be paid to the temperature during measurement, and avoid excessive measurement time and large-area contact with the inside micrometer by hand during the measurement process. Especially when measuring large dimensions.
- Since the 3-point inside micrometer does not have a force-measuring device, it is necessary to master the force-measuring size. Just touch the surface to be measured to avoid damage to the micrometer or causing large errors due to excessive rotational force.
- When measuring the pore diameter with a 3 point inside micrometer, the surface to be measured must be wiped clean and each section must be carried out in at least two directions perpendicular to each other, and the number of sections should be appropriately increased for deep holes.
- In order to improve the measurement accuracy, the use of the correction value of the inside micrometer should be considered.
- For correct reading, you must face up to the measuring tool reading device, and you cannot squint.
The internal micrometer avoids high temperatures and direct sunlight radiation and should be maintained frequently.
Builder in Product TAB
NEW! Since Journal 3.2, the much improved T.A.B (Tabs Accordion Blocks) system supports the page builder inside the tab content. Unlimited Blocks, Tabs or Accordions with any HTML content or the builder interface (supporting custom rows/columns/modules) can be assigned to any individual product or to certain groups of products, like entire categories, brands, products with specific options, attributes, price range, etc.
You can indicate any criteria via the advanced product assignment mechanism and only those products matching your criteria will display the modules.
Also, any module can be selectively activated per device (desktop/tablet/phone), customer login status and other criteria. Imagine the possibilities.
